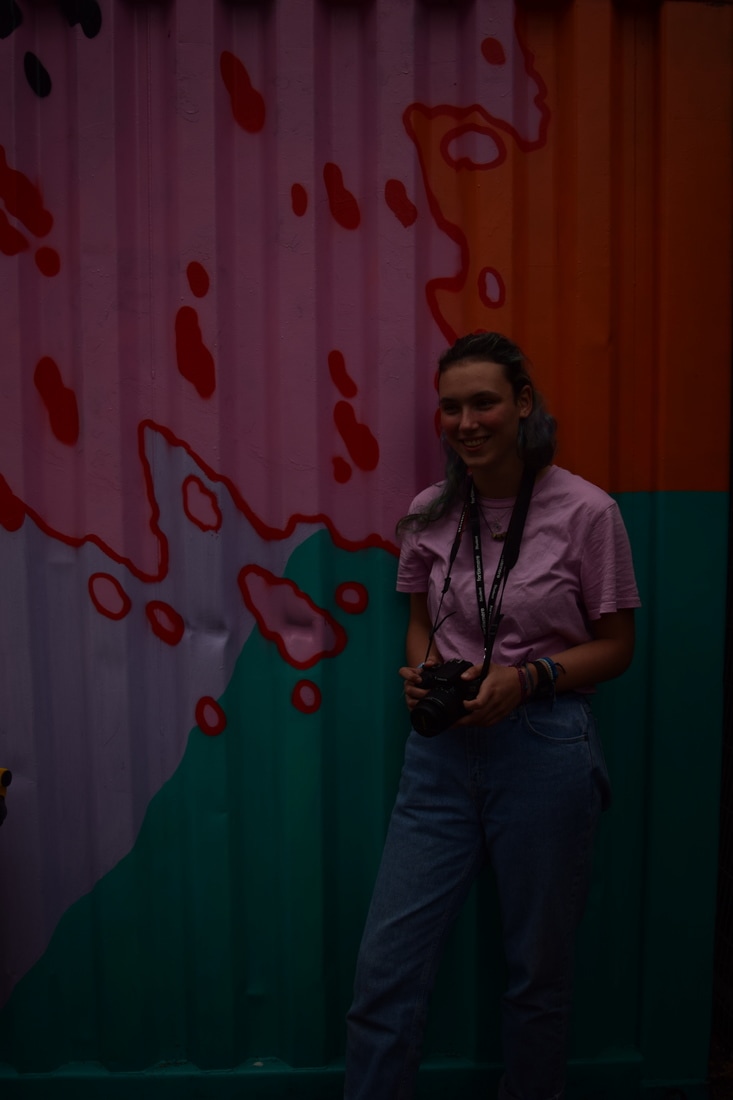
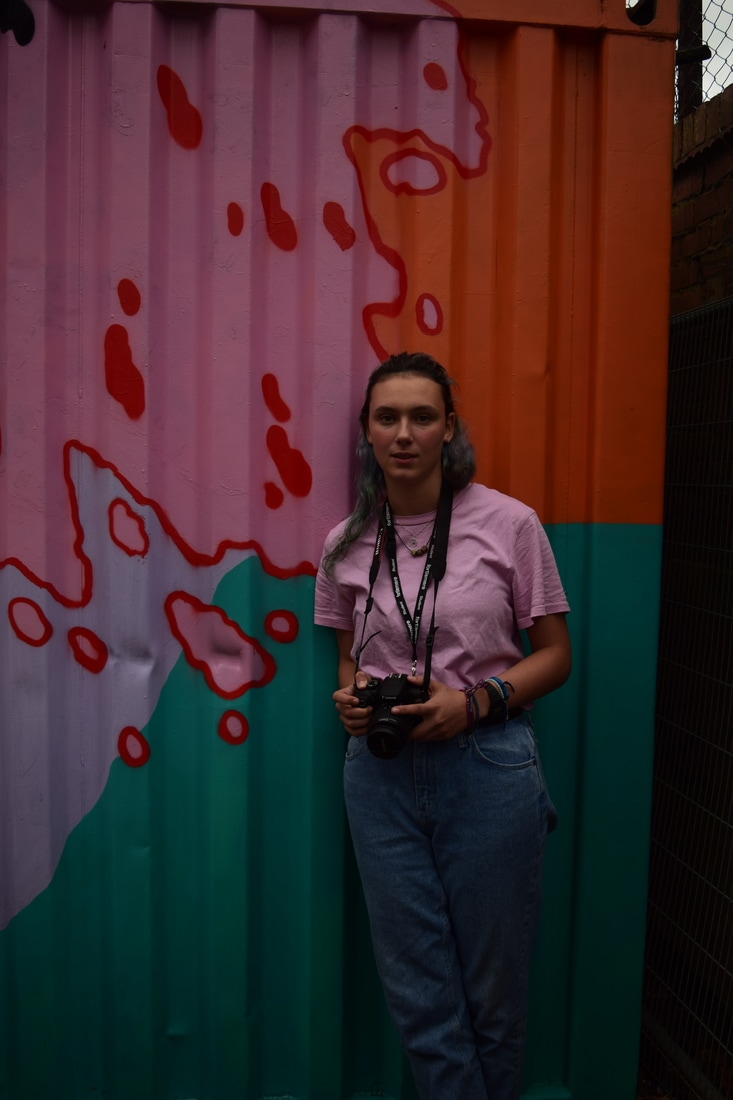
Forgotten Places - Summer Task
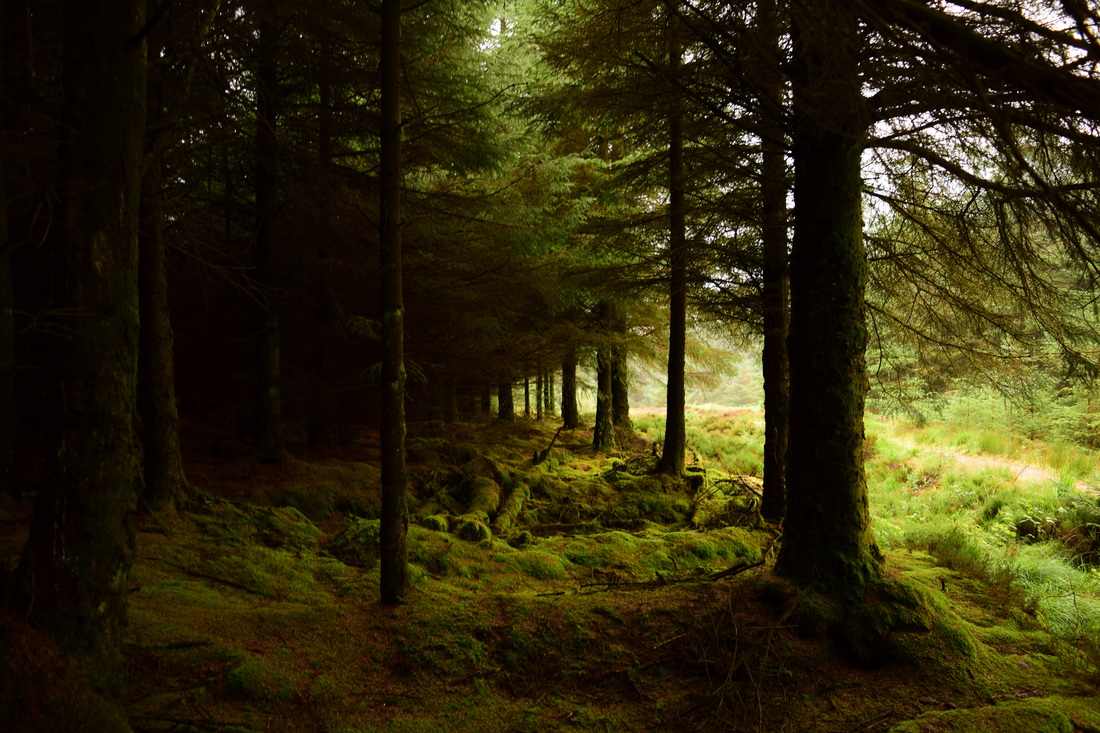
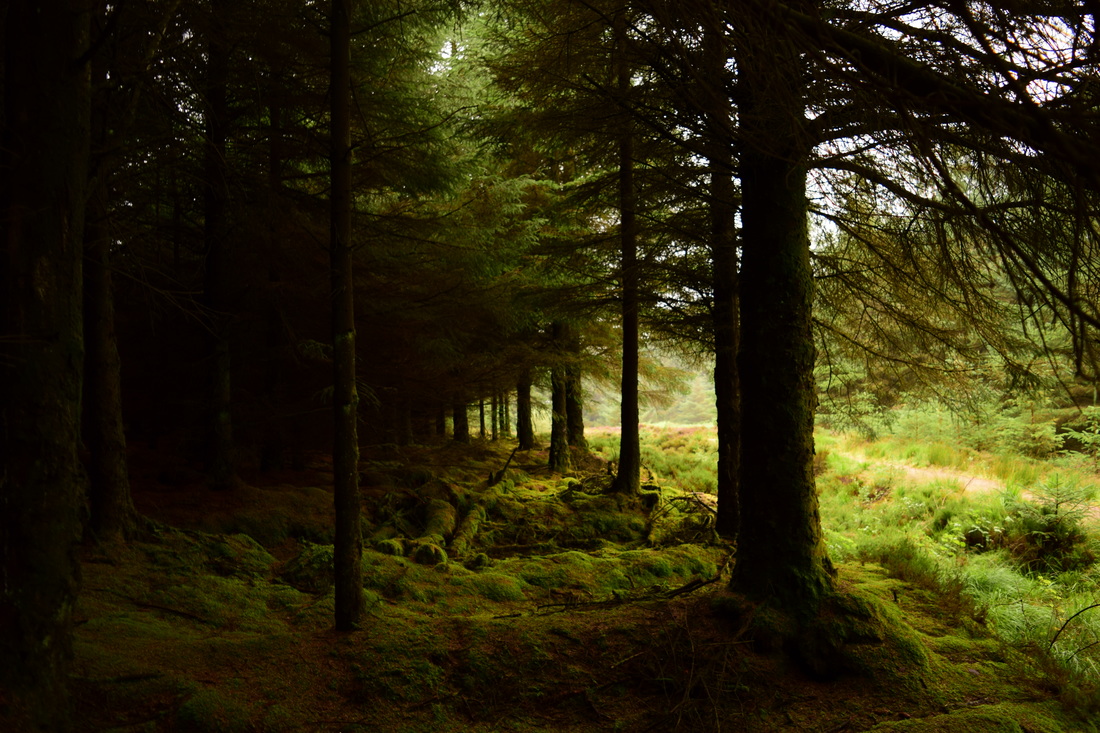

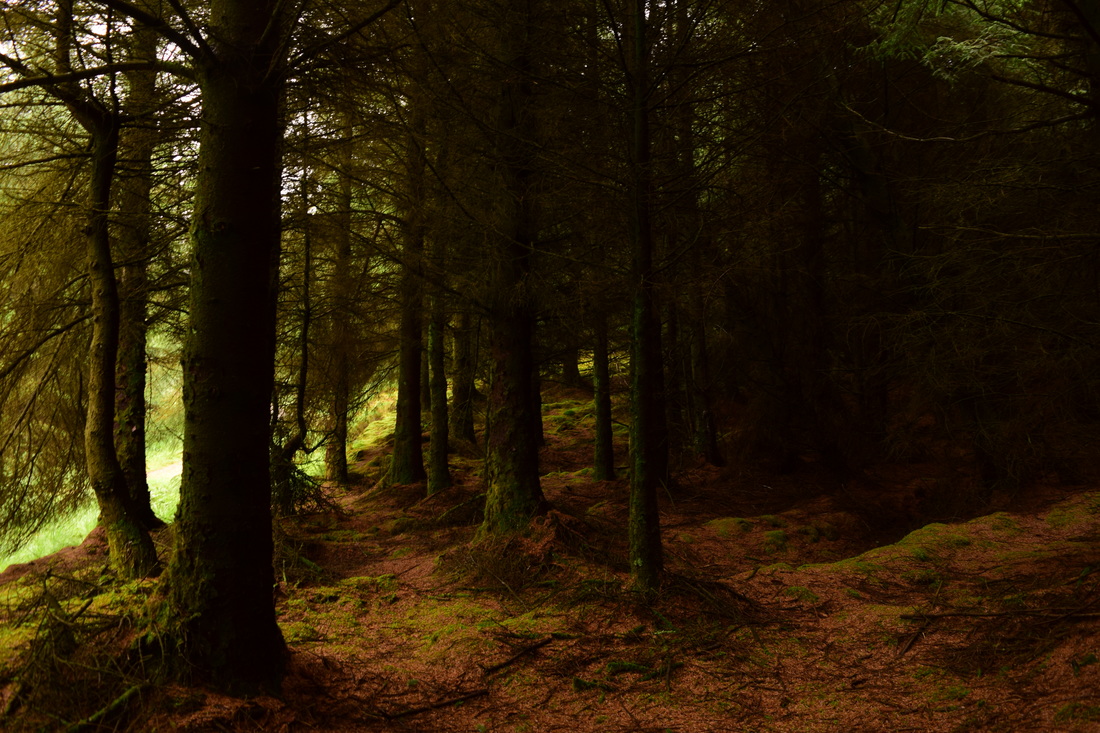

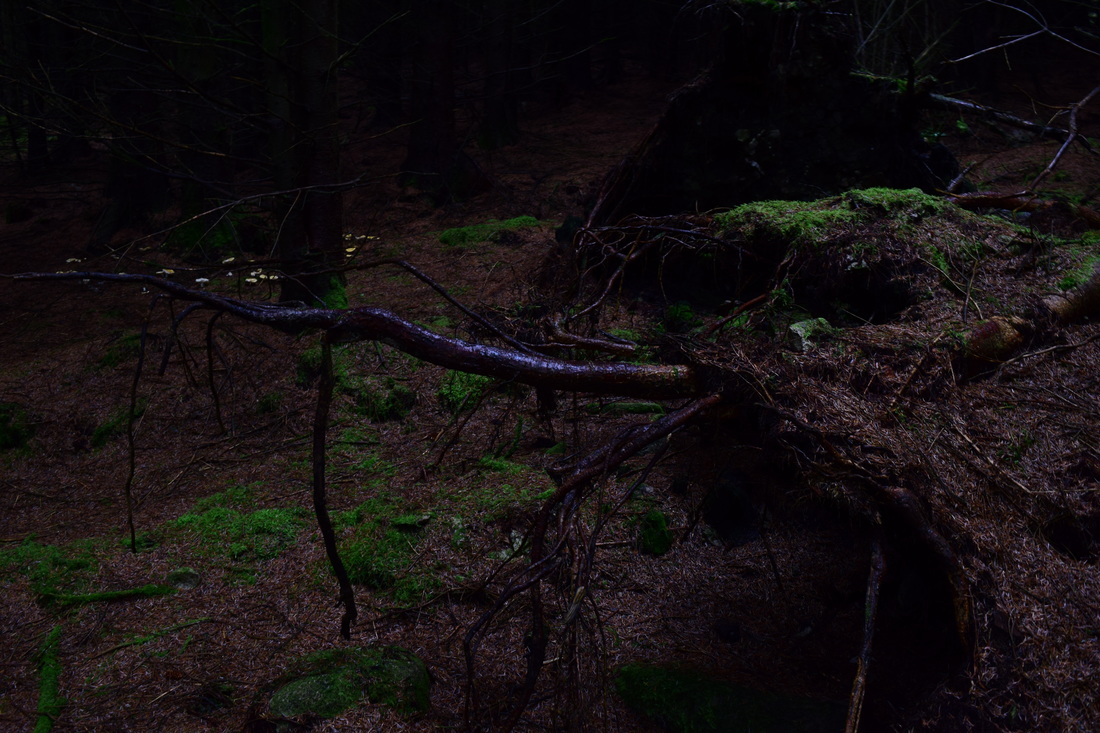
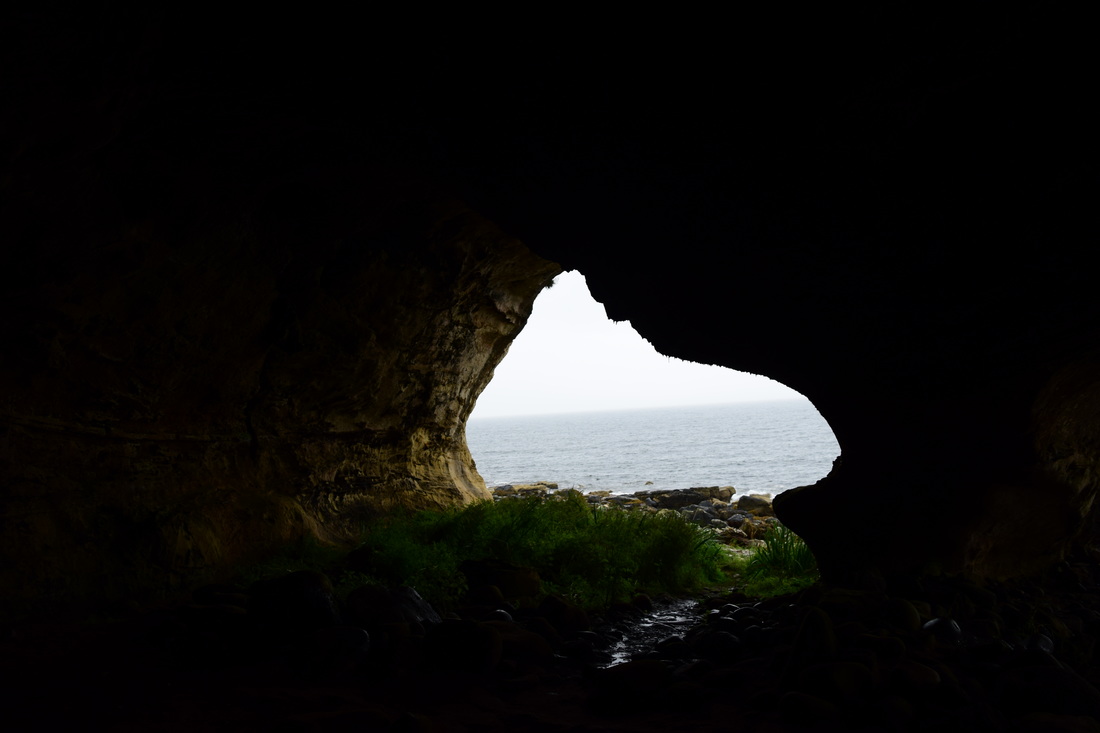


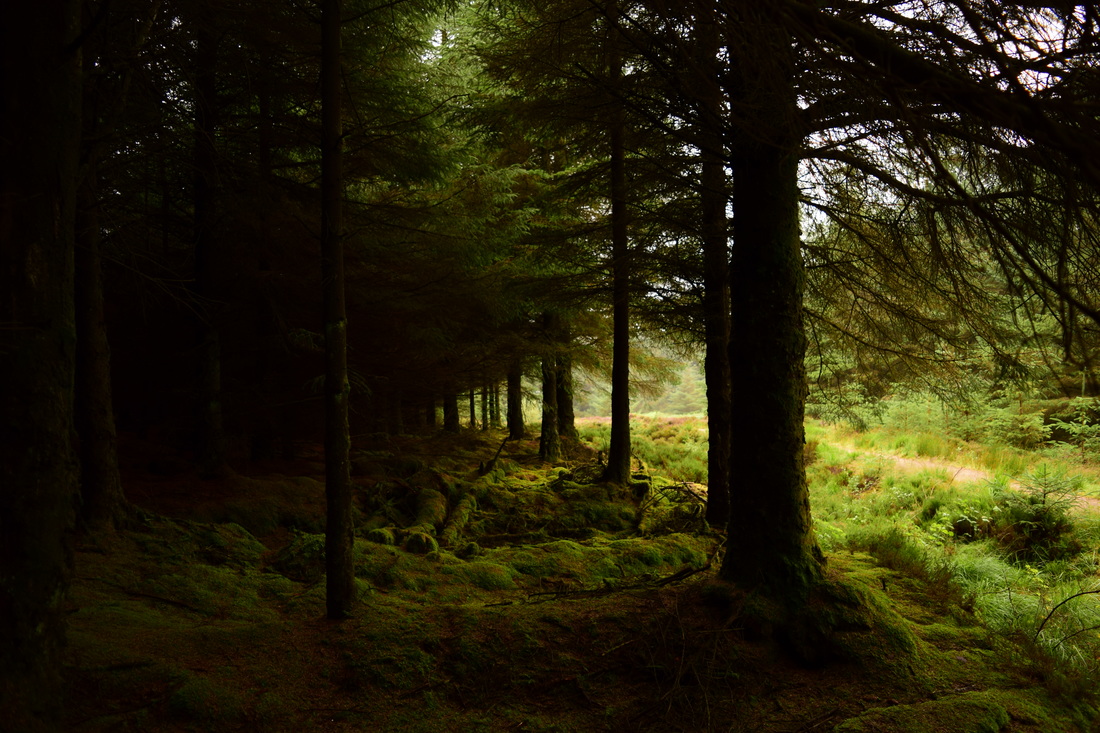
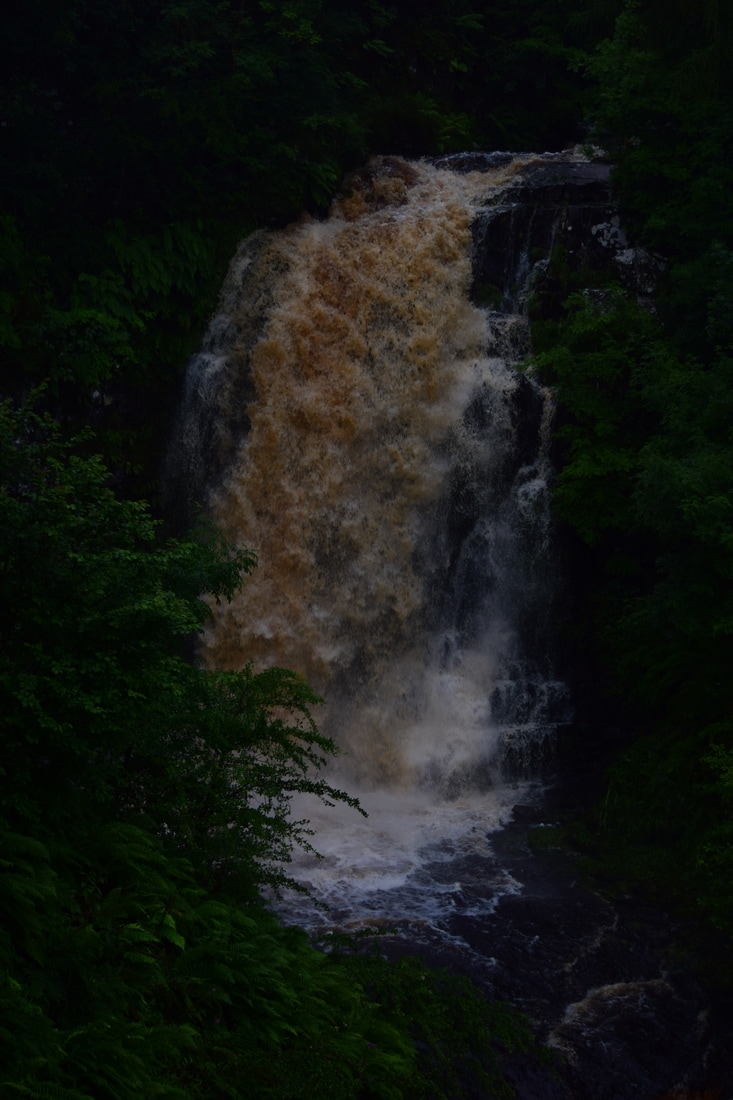
For this image I experimented with the effect of light infiltrating through the edge of the trees and dispersing into the woods. I think this particular wood was very effective in conveying a forgotten place as it has a lot of overgrowth and the ground is composed highly of moss. I created a long range of field to portray a never-ending aspect to this baron place as the end of the woods is inevident.
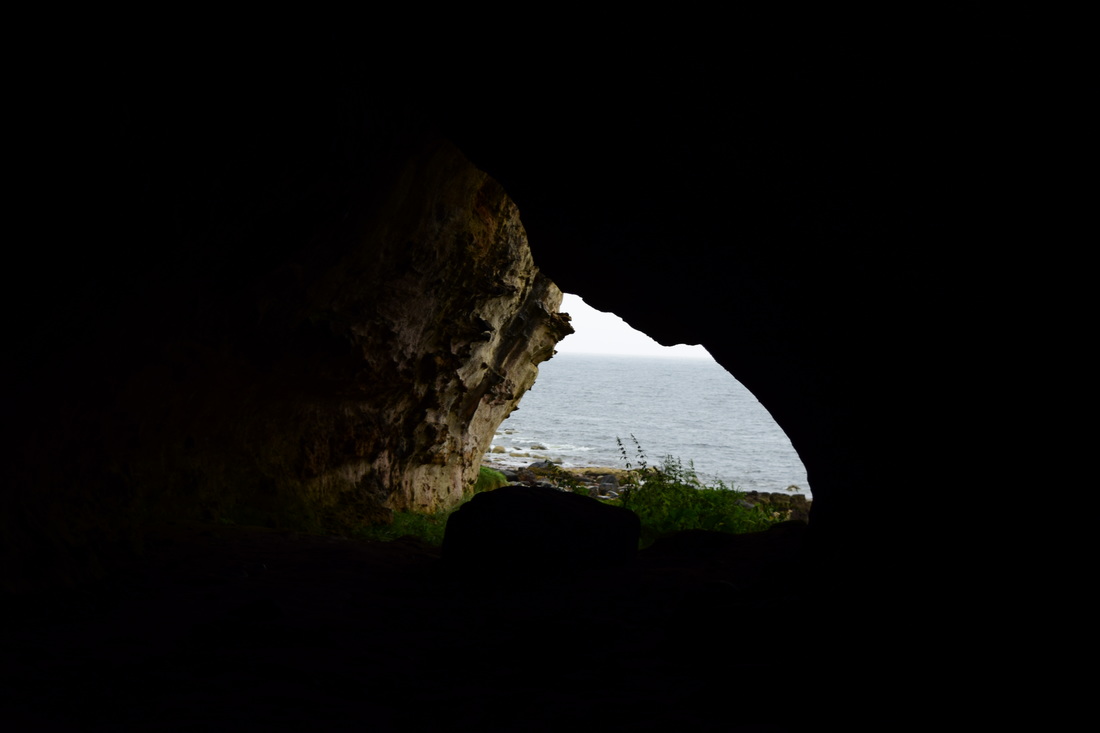
The lighting creates a spooky effect as the right side is very lit and then towards the left of the image the light is immersed in darkness due to the density of the woods.
The lighting creates a spooky effect as the right side is very lit and then towards the left of the image the light is immersed in darkness due to the density of the woods.

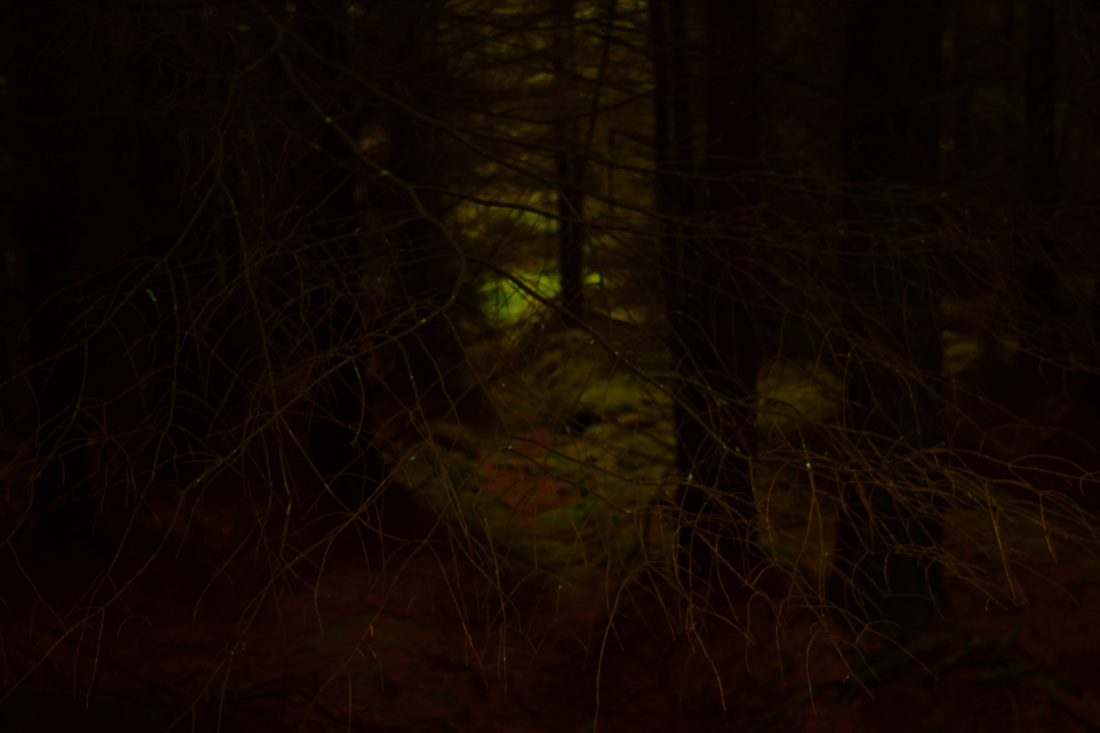
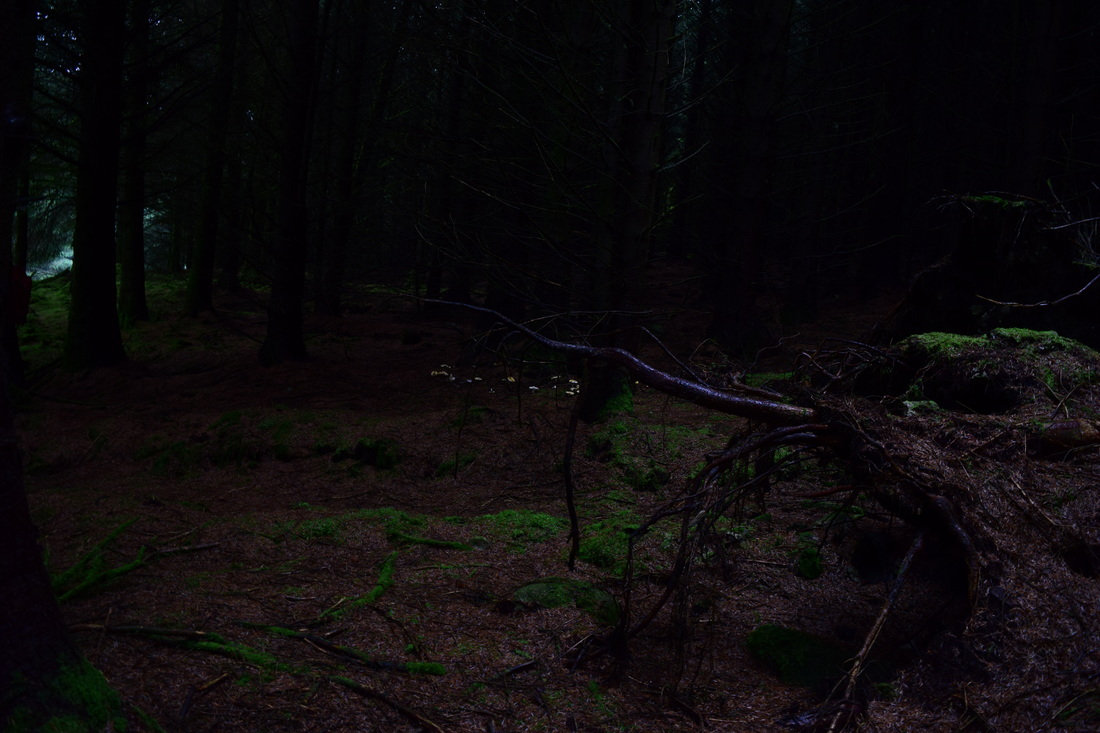
I used this branch in the woods to spread across my entire image and use a short depth of field so that only the branch was in focus which adds to the mystery of what the wood entails through this form of translucent veil. The low light in this image also adds to the atmosphere of a forgotten place.
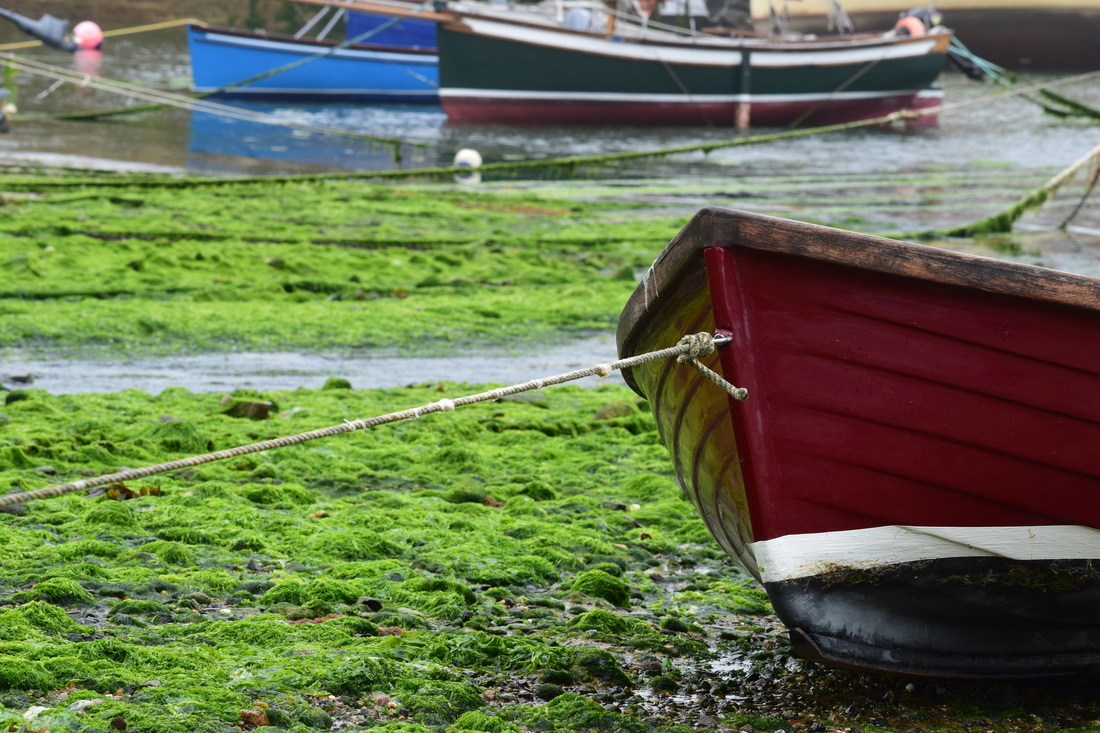
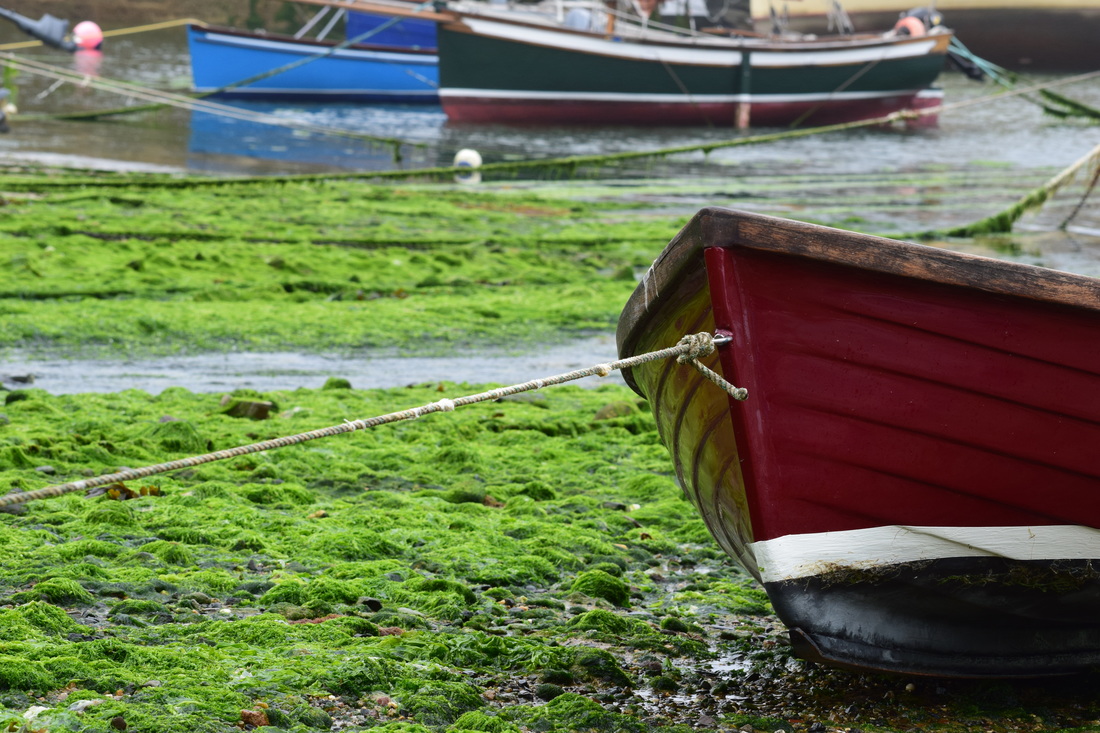
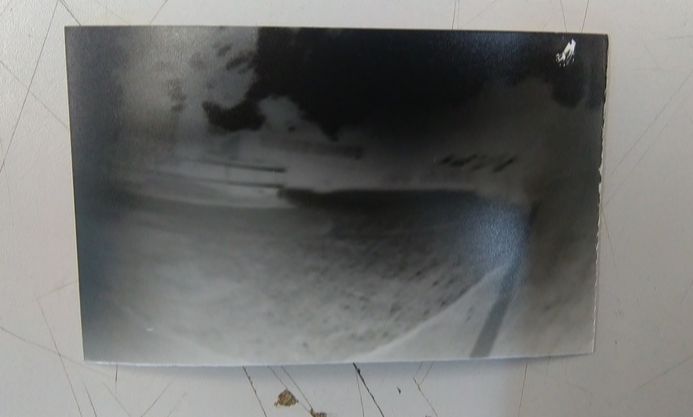
This was taken at an abandoned harbour where there was also a lot of overgrowth of moss but also seaweed. I used a short depth of field to focus attention on the abandoned boat and the blurred background demonstrates the overgrowth and other abandoned boats.

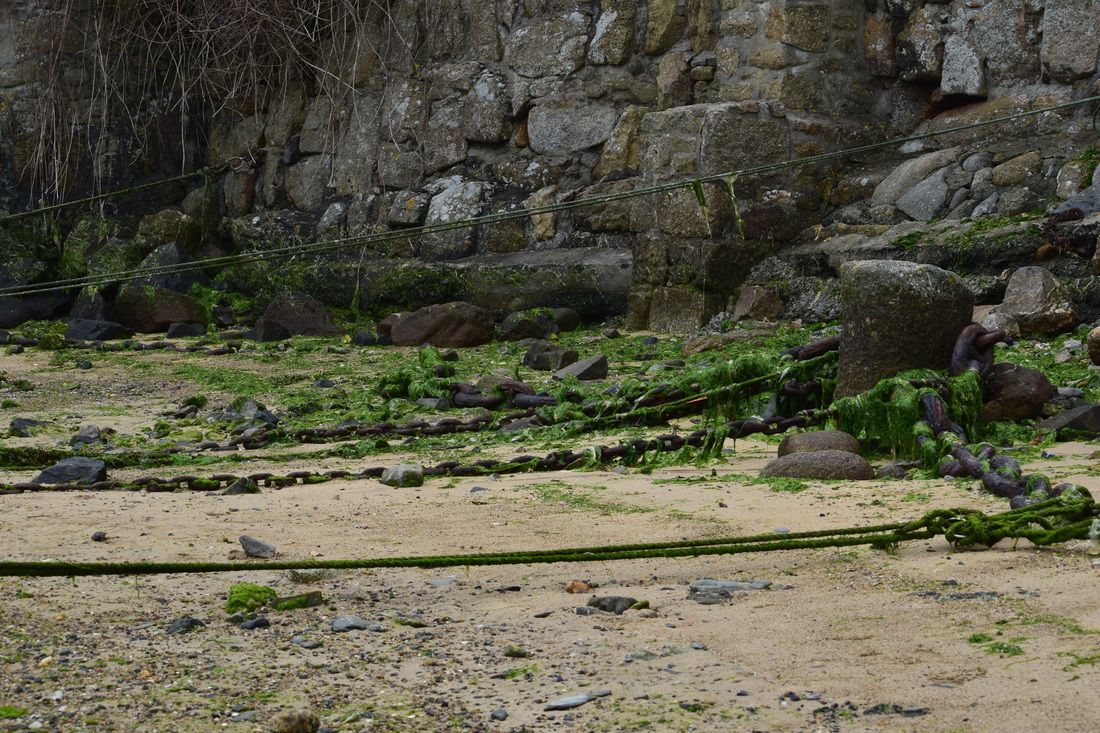
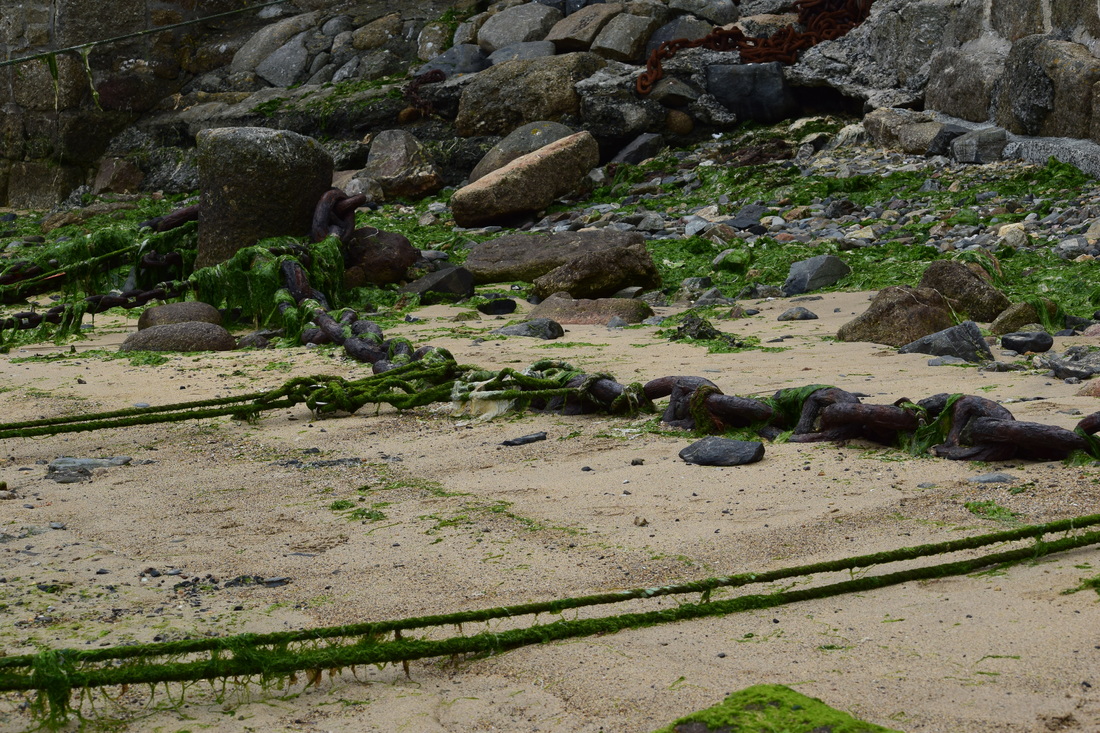
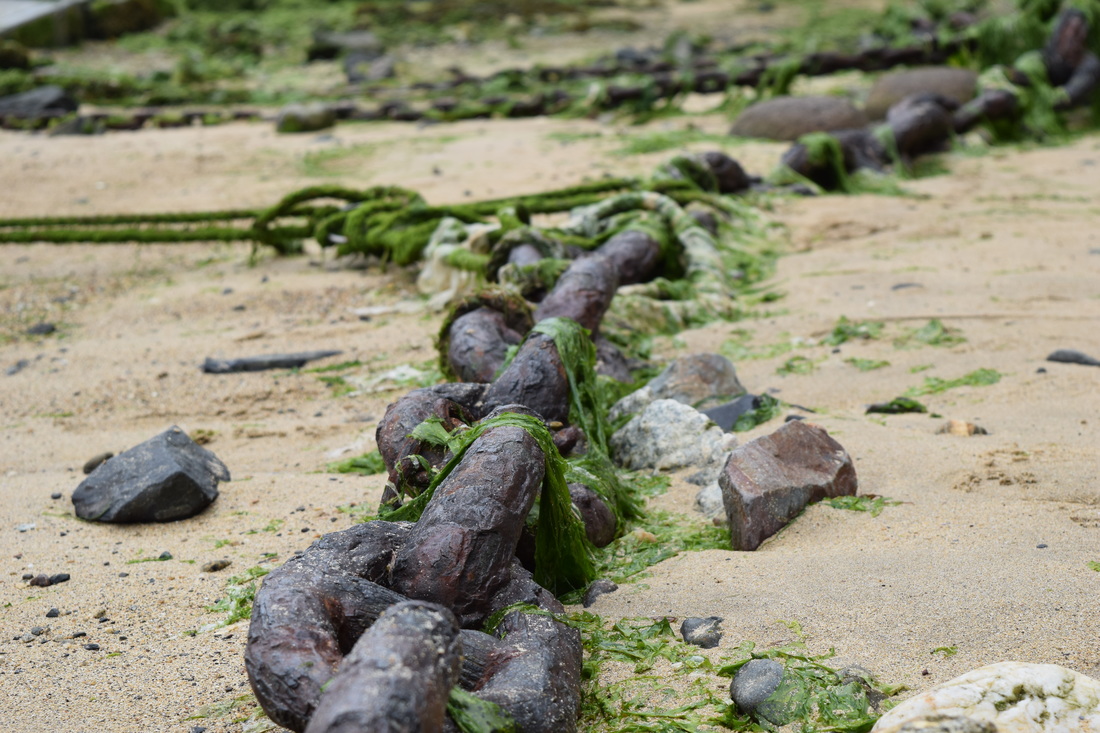
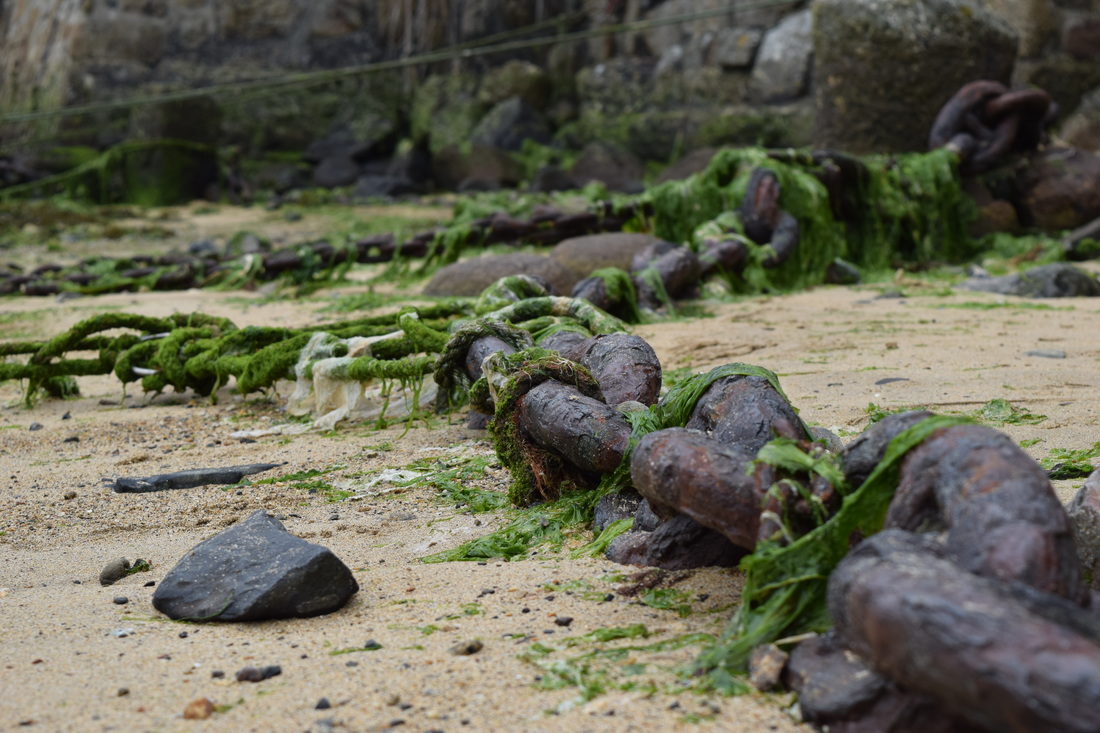
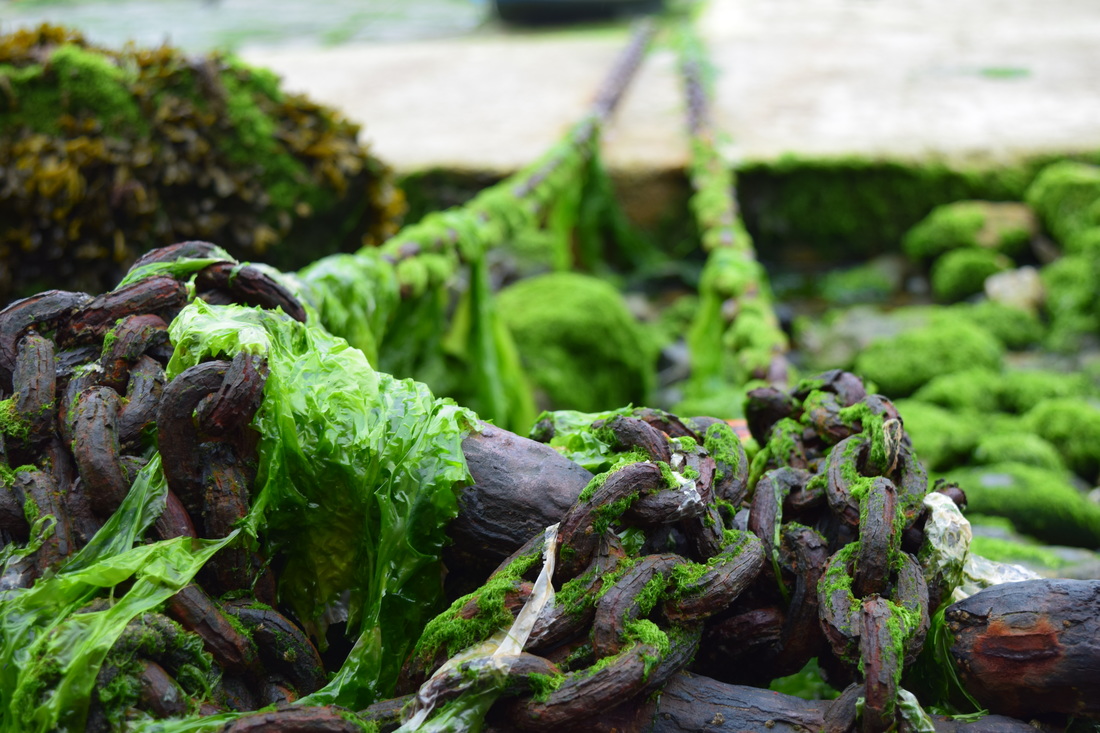
For this image I experimented with a ground-level angle to display a different aspect. I lined my camera up with the rusting iron chain so that its beginning and end was obscured from view and therefore unknown. The short depth of field allowed the focus to be on the rusting of the close-up part of the chain at the centre of the image to draw attention to the rust and dry seaweed and therefore its lack of use.
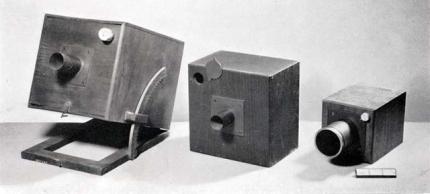
Early History of Photography
|
Daguerreotype - The image is exposed directly onto a mirror-polished surface of silver bearing a coating of silver halide particles deposited by iodine vapor. In later developments bromine and chlorine vapors were also used, resulting in shorter exposure times. The daguerreotype is a negative image, but the mirrored surface of the metal plate reflects the image and makes it appear positive in the proper light. Thus, daguerreotype is a direct photographic process without the capacity for duplication.
|
|
|
Calotype camera process involves negatives that are later printed as positives on paper. Talbot discovered his Calotype process in September 1840. He announced his discovery on 8 February 1841, though at that stage he gave no details of the process. He patented the process later in 1841.
The attraction of the calotype process was that it enabled a latent image on the paper to be transformed into an actual image after the paper had been removed from the camera. The calotype process allowed much shorter exposures than for photogenic drawing, and so made portraits possible. Exposures of around 1 to 3 minutes might be required for a calotype. Talbot's earlier photogenic drawing process might have required an exposure of an hour. |
|
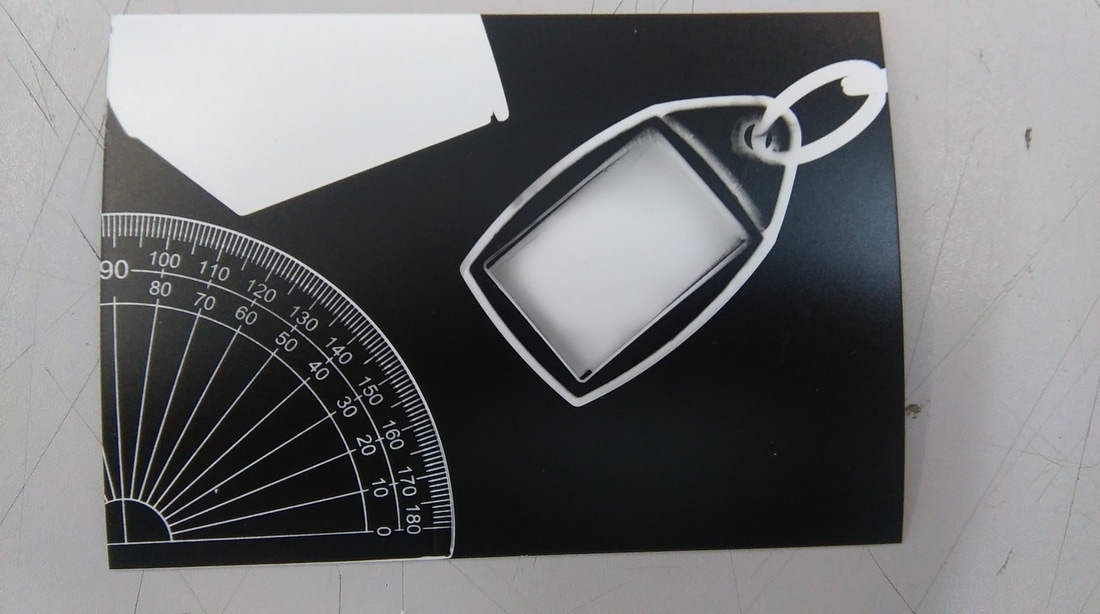
Photograms
The photograms are produced on light-sensitive paper under an enlarger in a dark room.
First the correct lighting height and focus is prepared whilst the white light is under a red filter as the light-sensitive paper is not effected by red light. Objects are then positioned on top of the paper as obstructions to the light which then create outlines once the red filter is removed and the paper becomes exposed to the white light and having been developed. The best exposure time is determined by a test strip.
The developing process involves placing the paper in the developer chemical for roughly 2 minutes (varies depending on the strength of the chemical which generally depends on the dilution and use time). Next the paper is transferred to the stop chemical for 1 minute and then on to the fix chemical for 3 minutes. Finally the paper is placed in a water bath where it remains for 5 minutes to ensure there are no chemical remnants on the paper. At this point the photogram can leave the dark room where they are dried in a dryer or can air dry.
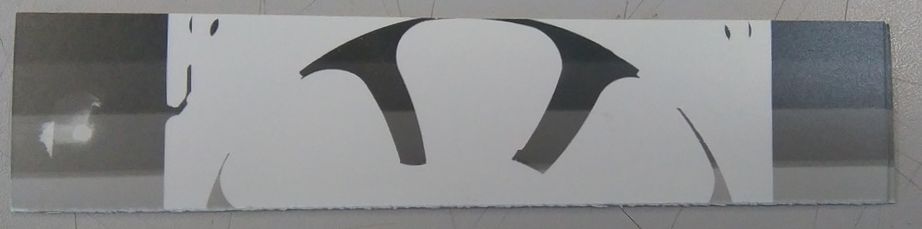
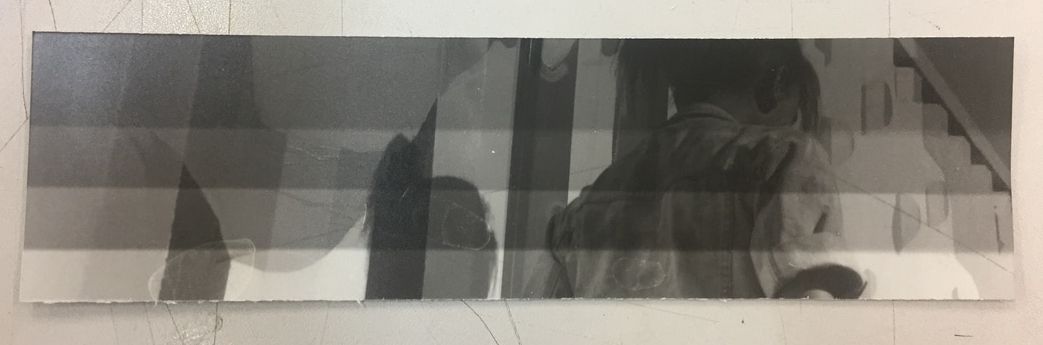
Below is my test strip with 1 second intervals; I determined that the optimum exposure time was four seconds.
First the correct lighting height and focus is prepared whilst the white light is under a red filter as the light-sensitive paper is not effected by red light. Objects are then positioned on top of the paper as obstructions to the light which then create outlines once the red filter is removed and the paper becomes exposed to the white light and having been developed. The best exposure time is determined by a test strip.
The developing process involves placing the paper in the developer chemical for roughly 2 minutes (varies depending on the strength of the chemical which generally depends on the dilution and use time). Next the paper is transferred to the stop chemical for 1 minute and then on to the fix chemical for 3 minutes. Finally the paper is placed in a water bath where it remains for 5 minutes to ensure there are no chemical remnants on the paper. At this point the photogram can leave the dark room where they are dried in a dryer or can air dry.
Below is my test strip with 1 second intervals; I determined that the optimum exposure time was four seconds.
|
|
|
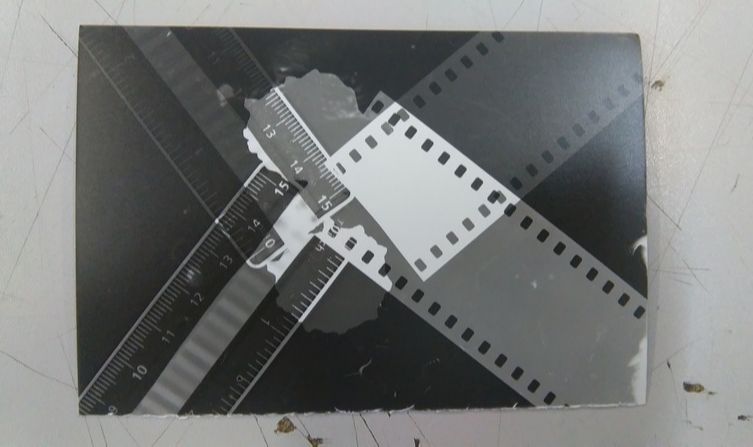
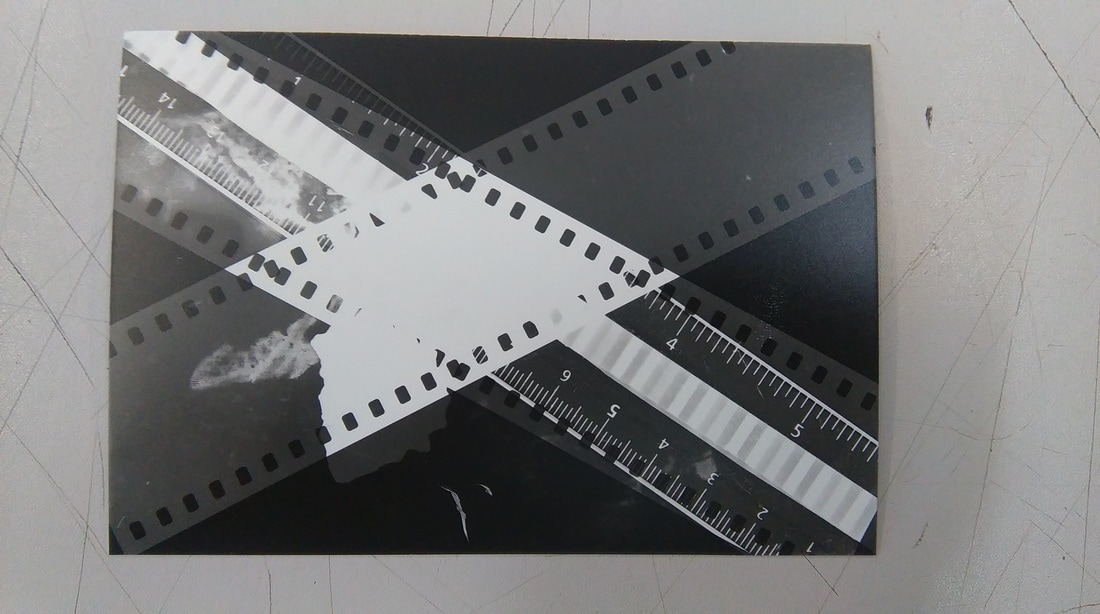
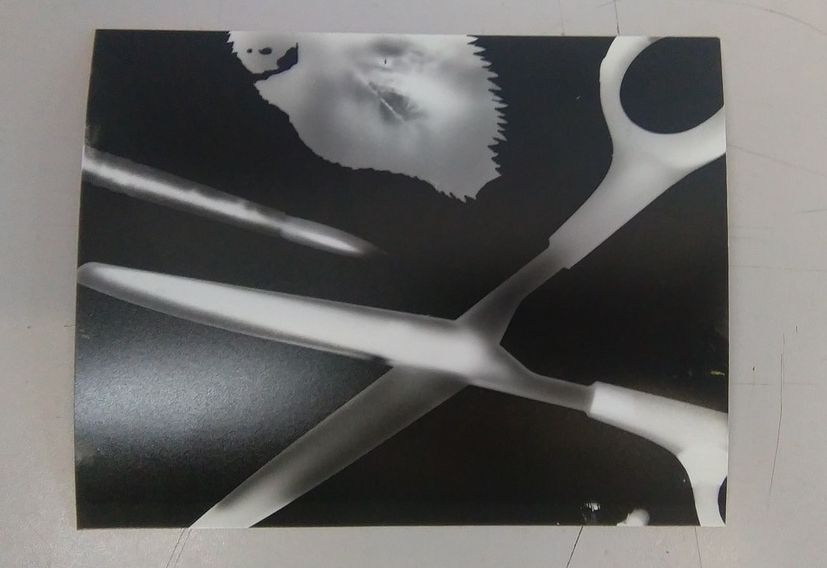
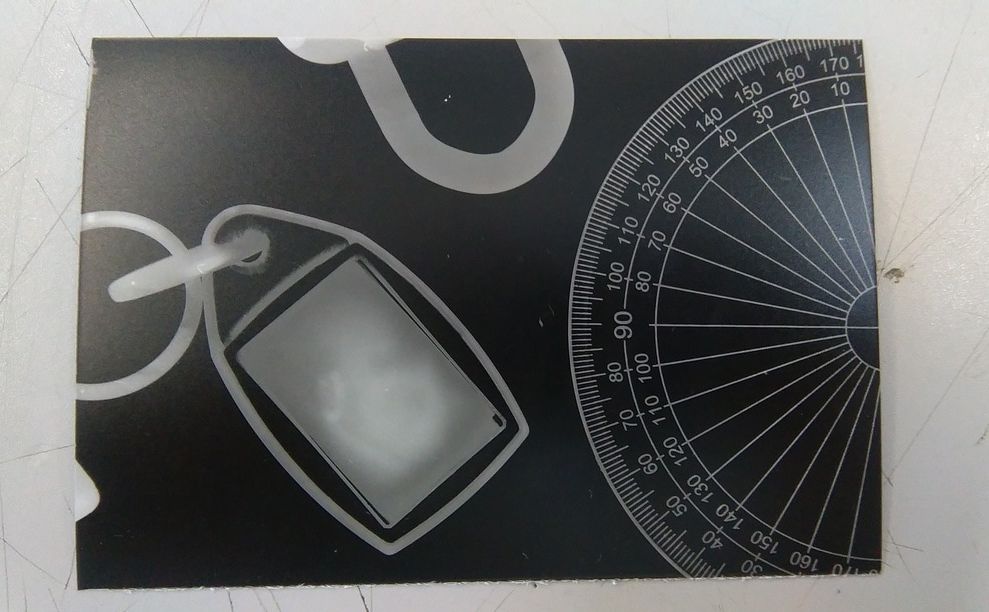
There are developments of photograms that can be done.
The first is double exposure whereby the exposure time is halved so that the objects can be removed or replaced on the paper to create a layered effect on the unexposed areas in which they cross.
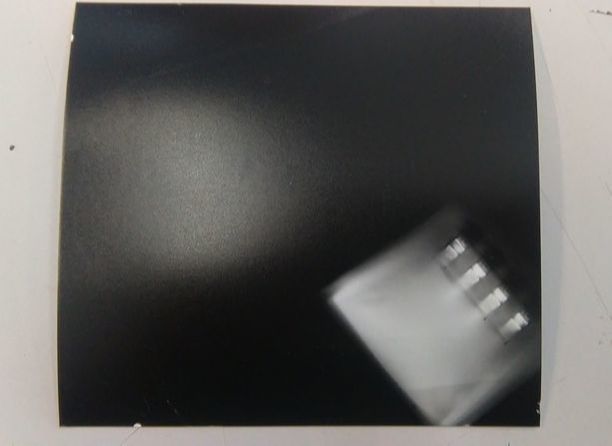
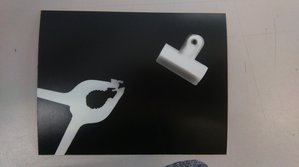
Below are my attempts, the lighter areas are where the objects crossed from their past position and so light was never exposed on it. Unfortunately some chemicals had reached the light-sensitive paper which effected my results which left a splatter of lighter section in the photograms as the light was no longer as effective through the chemical.
The first is double exposure whereby the exposure time is halved so that the objects can be removed or replaced on the paper to create a layered effect on the unexposed areas in which they cross.
Below are my attempts, the lighter areas are where the objects crossed from their past position and so light was never exposed on it. Unfortunately some chemicals had reached the light-sensitive paper which effected my results which left a splatter of lighter section in the photograms as the light was no longer as effective through the chemical.
|
|
|
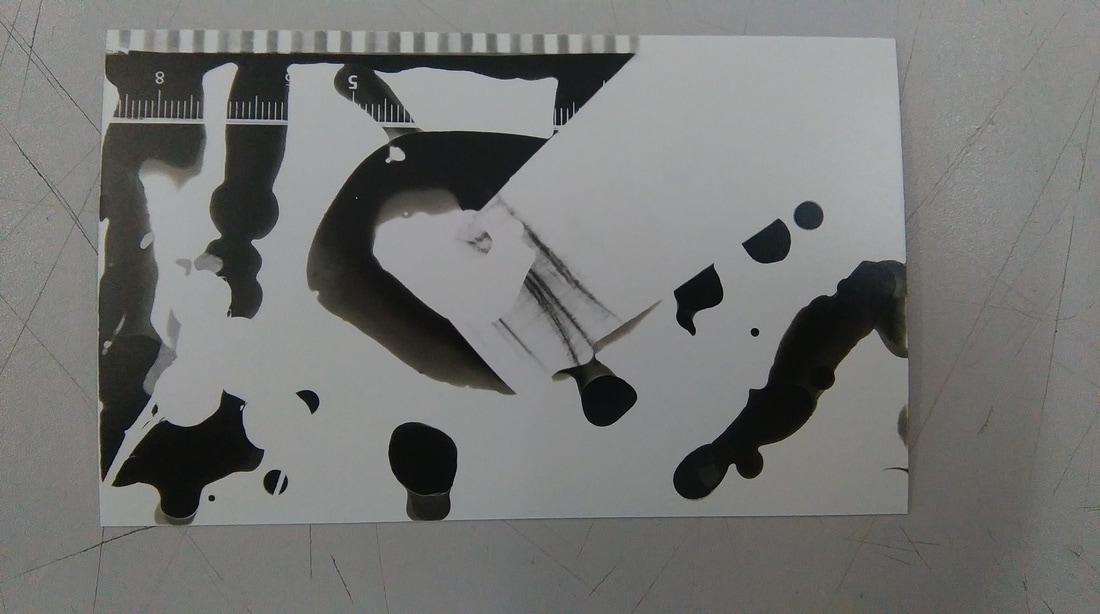
The second development is painting with developer which is arguably achieved above by accident. However purposely using this technique involves exposing the paper with obstructions as normal but then only using a paintbrush to selectively apply the developer so that only parts of the image develop. The paper is then placed in the other chemicals and water bath as normal.
The final effect is very abstract as only some areas are exposed and give evidence as to what object was used to obstruct the light (right image). |
|
The third development was solarisation. This is achieved by exposing the paper to light as normal and to develop and agitate your paper normally. When the image begins to appear, the paper is removed from the developer and placed into a tray of water for about ten seconds which slows the development process. The next step is to re-expose the paper to light for less than or equal to a second. Then the normal development process follows.
The result is the areas that in a typical photogram would be white end up grey and certain areas appear more illuminated which creates more tone and a shading effect.
The result is the areas that in a typical photogram would be white end up grey and certain areas appear more illuminated which creates more tone and a shading effect.
|
|
Pinhole Camera
|
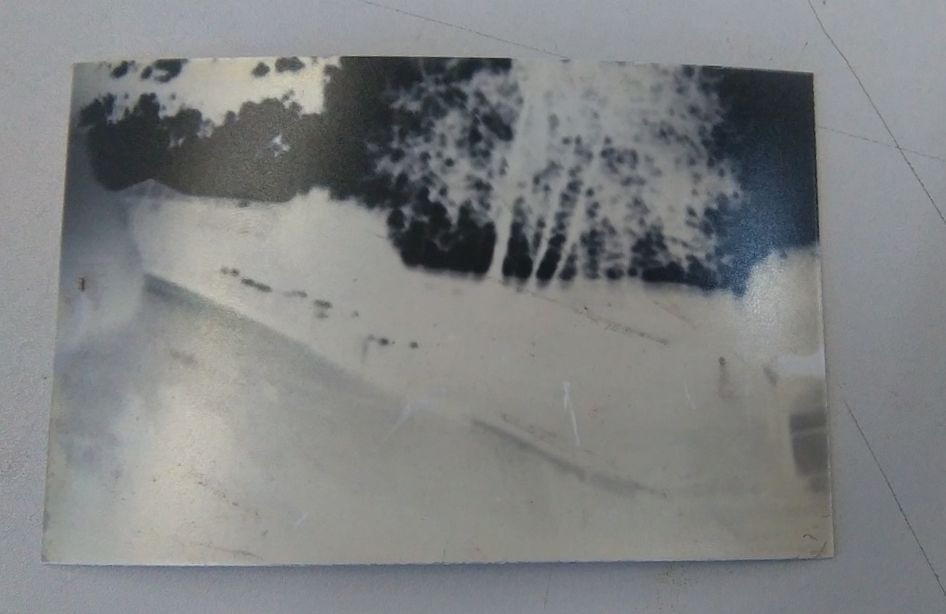
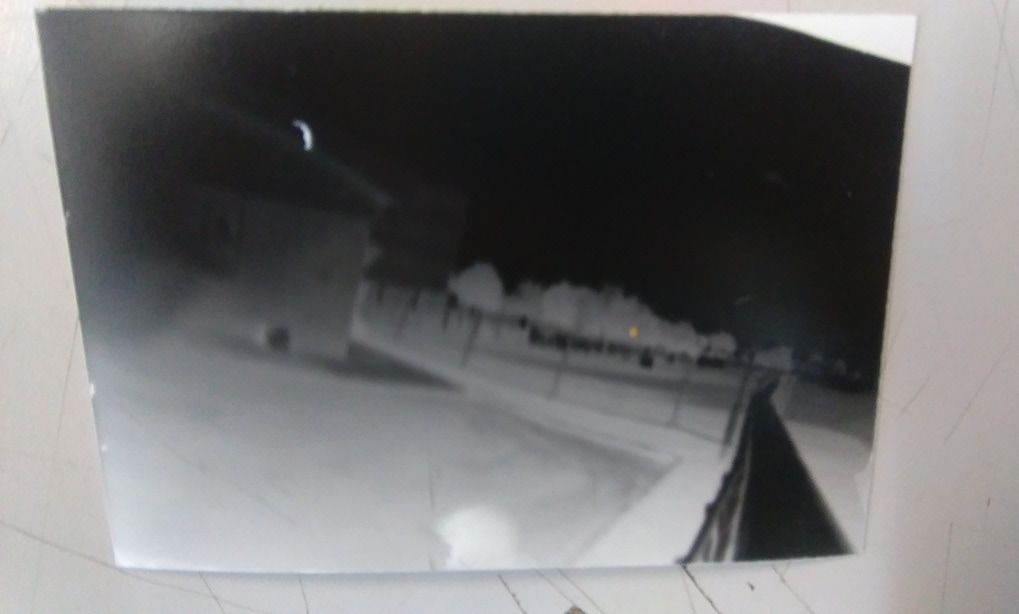
A pinhole camera is a variation of the Camera obscura which is a simple camera without a lens and with a single small aperture, a pinhole. A light-proof box with a small hole in one side is used, mine was made from a small, cylindrical pringles box which is coated in tape and the inside is covered with black card to prevent light reflection. Light from a scene passes through this single point and projects an inverted image on the opposite side of the box where the photographic paper is. The exposure timing is a process of trial and error but can be estimated depending on the lighting; for example its direction in relation to the pinhole and the brightness.
The paper is then removed in the dark room and goes through the normal developing process. |

|
|
|
|
The SLR Camera
An SLR camera, otherwise known as a single-lens reflex camera, uses a mirror and prism system that permits the photographer to view through the lens and see exactly what will be captured within the frame.
Aperture
|
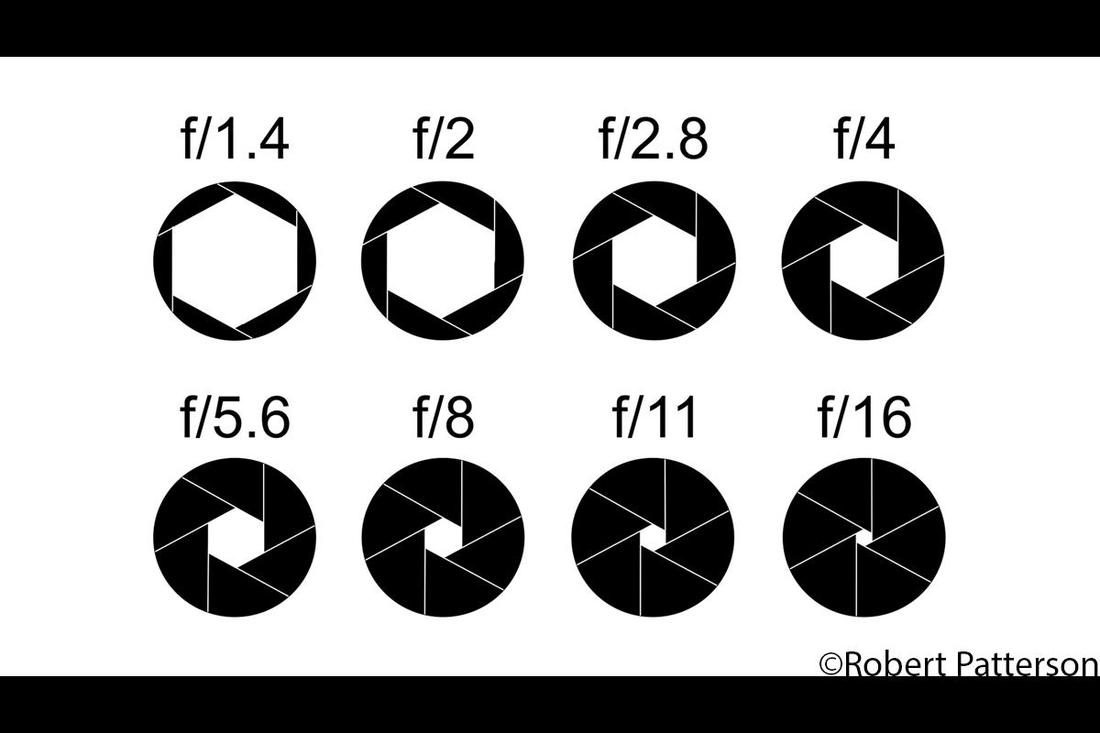
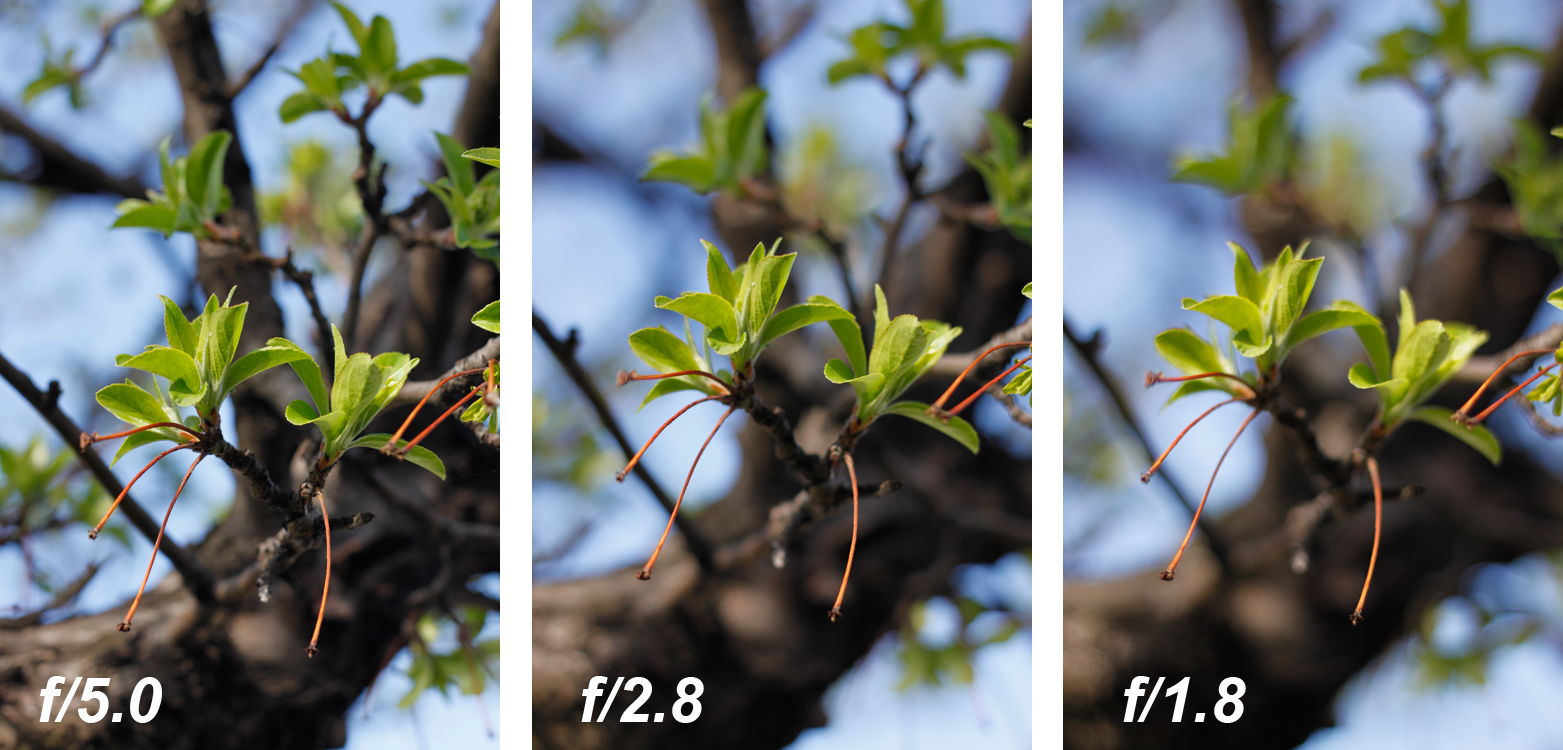
Aperture is the space in which light passes through and is one of the three pillars in photography alongside ISO and shutter speed. The size of the aperture varies depending on the diaphragm (diameter) of the iris of the lens. A larger diaphragm (high aperture) allows in more light and results in a smaller area of focus (depth of field) and vice versa with a smaller diaphragm (low aperture).
|
|
Shutter Speed
Shutter speed is the next of the three pillars in photography and is responsible for dramatic effect either by freezing action or blurring motion. Essentially a camera shutter is a curtain in front of the camera sensor that stays closed until the camera fires. When the camera fires, the shutter opens and fully exposes the camera sensor to the light that passes through the lens aperture. After the sensor is done collecting the light, the shutter closes immediately, stopping the light from hitting the sensor. It is responsible for the exposure time and one thing to note is as a high shutter speed exposes for less time it therefore lets in less light and often requires a higher aperture diaphragm (lower f number).
Shutter speeds are typically measured in fractions of a second, when they are under a second. For example 1/4 means a quarter of a second, while 1/250 means one two-hundred-and-fiftieth of a second or four milliseconds. Most modern DSLRs can handle shutter speeds of up to 1/4000th of a second, while some can handle much higher speeds of 1/8000th of a second and faster. The longest shutter speed on most DSLRs is typically 30 seconds (without using external remote triggers).
Shutter speeds are typically measured in fractions of a second, when they are under a second. For example 1/4 means a quarter of a second, while 1/250 means one two-hundred-and-fiftieth of a second or four milliseconds. Most modern DSLRs can handle shutter speeds of up to 1/4000th of a second, while some can handle much higher speeds of 1/8000th of a second and faster. The longest shutter speed on most DSLRs is typically 30 seconds (without using external remote triggers).
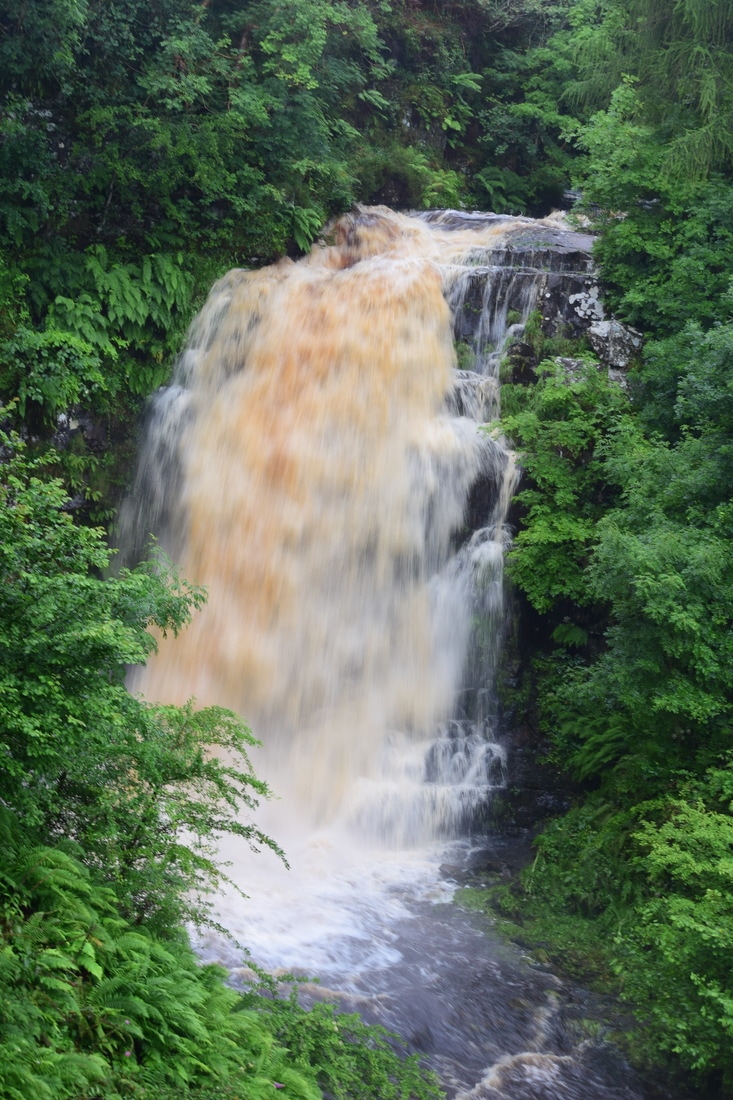
Shutter speed: 1/20
|
Shutter Speed: 1/320
|
ISO
ISO is the camera's sensitivity to light: a low ISO is less sensitive to light and contains less noise (grain) in the image which results in a higher quality image. A high ISO is more sensitive to light and can contain a lot of noise which greatly diminishes the quality of the image. Between each ISO setting the sensitivity of the sensor doubles which means it requires half the exposure time the directly lower ISO.
ISO Speed Example:
ISO 100 – 1 second
ISO 200 – 1/2 of a second
ISO 400 – 1/4 of a second
ISO 800 – 1/8 of a second
ISO 1600 – 1/16 of a second
ISO 3200 – 1/32 of a second
You should increase the ISO when there is not enough light for the camera to be able to quickly capture an image.
ISO Speed Example:
ISO 100 – 1 second
ISO 200 – 1/2 of a second
ISO 400 – 1/4 of a second
ISO 800 – 1/8 of a second
ISO 1600 – 1/16 of a second
ISO 3200 – 1/32 of a second
You should increase the ISO when there is not enough light for the camera to be able to quickly capture an image.
ISO 100
|
ISO 400
|
The Film Camera
A film camera captures the light energy onto a small two-dimensional surface which known as the film. The film is contained within a completely light tight case to protect the film. The film camera contains:-
- An aperture (or diaphragm): a small circular hole in the case that lets in light for the exposure period when you take a photo.
- A shutter mechanism: a spring-loaded set of overlapping blades that open to let light in through the aperture for a precise amount of time before closing up again.
- One or more lenses in front of the shutter and their roles are to: scale down the image so it fits onto the film; lenses concentrate the incoming light energy so the image forms on the film more quickly and the camera can be used in darker conditions than would otherwise be the case; they bring the light rays into a sharp focus exactly on the surface of the film, so you get a clear, sharp, image rather than a blurred, fuzzy impression; they also minimise the distance between the aperture and the film so cameras can be made relatively small and portable.
A Contact Sheet
|
A contact sheet contains thumbnails of the photos from the shoot.
Process for film contact sheet First I had to process my film in the dark room. Once it had dried I was able to make the contact sheet. I cut my film into equal strips of five images and then lined them up in a plastic sheet designed for holding film. Then I took the sheet into the dark room where I placed it on photographic paper, exposed it and then processed the paper which resulted in the production of the contact sheet (shown on right). |

|
Test Strip for Final Print
I placed the filmstrip under the enlarger and made a test strip to determine the optimum exposure time. The intervals were 1 second and I determined the ideal time was 3 seconds.
Final Print